Why does my printer keep saying cartridge problem?
Suppose you have decided to buy remanufactured cartridges and use them in your printer to save money. After installing them, however, the bitter surprise arrived: the printing device in your possession categorically refuses to carry out its task, "complaining" about the presence of a discharged cartridge or, even worse, not correctly recognized. Are you already thinking of sending the printer for service? It may not be necessary: many devices of this type integrate within them protection mechanisms capable of preventing the use of non-original cartridges, thus blocking the printing processes

The first method to get around the print block with remanufactured cartridges that they want to notify you of is to disable the print monitor. Although this feature is not present on all inkjet printers, it is the simplest and fastest technique to solve this annoying problem. Therefore it will continue to print regardless of their conditions.
This operation, however, has some minor side effects. One of the most important features of the print monitor is the display of the residual ink levels in the various cartridges in use. Deactivating it, therefore, you will no longer have the opportunity to know the latter's estimate, thus risking running out when you least expect it. Here are some of the most commonly used procedures for some popular printer brands.
To disable the print monitor via software, the drivers for your printing device must be installed on your computer.
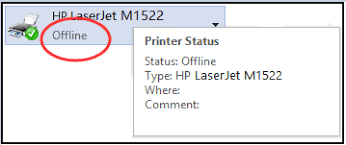
HP printers - you can find the option to disable the print monitor in the printer properties panel. At this point, choose the item for devices and printers, right-click on the icon of the printer to be configured and presses the item Properties in the proposed menu. Finally, move to the advanced tab, press the HP Printing Preferences button, and, on the next screen, put the checkmark next to the box Disable HP Monitor Ink Level. Press the OK button twice for the changes to take effect.
Epson printers - again, you can disable Epson Status Monitor from the printer management options. On Windows, go to the Devices and Printers section of the Control Panel as they showed you above, right-click on the Epson printer icon and select the Printing Preferences item. At this point, click on the Utility tab attached to the next window, click on the Speed and progress button located at the bottom right and put the checkmark next to the item Disable EPSON Status Monitor located in the panel that appears on the screen. To conclude and confirm the changes, press the OK button twice consecutively.
Brother printers - follow the same procedure for Epson devices to enter the Print Preferences settings. From there, click on the Advanced / Advanced tab, then on the Status Monitor / Status Monitor item, put the checkmark next to the Off / Off option. Then press the OK button twice in succession to finalize the changes.
Canon printers - most printers allow the print monitor to be disabled directly from the hardware. After sending a document to print and receiving the warning about the out of ink level, press and hold the restart / reset button for at least 5 seconds, or until printing starts.
Update the printer firmware
It may happen that, due to a "defective" update, the printer firmware expressly blocks the prints started in the presence of original cartridges: this is the case, for example, of some HP devices, victims of an annoying software bug that prevented printing where remanufactured cartridges were used.
In this case, the quickest solution is to update the printer firmware to the latest version available to minimize the risk of sudden and unmanaged malfunctions. Almost all printers connected to the Internet, either directly or via the computer network, are configured to download and install the available firmware updates automatically.
When you are done, you have to run the installation file obtained above (e.g. for Windows and pkg for macOS) and follow the instructions on the screen to finalize everything.
Suppose your printer is equipped with an LCD. In that case, you can update the firmware directly:
• Connect the printer to the Internet (via Ethernet cable or through the PC).
• Access its Settings using the physical keys available.
• Enter the section Update and follow the on-screen instructions to proceed.
If you can't do it yourself, they suggest you refer to the printer's user manual at your disposal, retrieve the update instructions from the manufacturer's website, or search for information on Google, using the search key to activate automatic updates.


Comments
Post a Comment